Wednesday, 29 March 2017

SSB Ham Radio Satellites a beginners guide

This page was last updated 31/May/2019 after a lot more experimenting and success in making SSB contacts.

The old page has been save here 


2019 An SSB Satellite Odyssey

So over the last month I have at long last had some time to play with my old and trust Ft-847 radio and make several successful SSB contacts.

I'm going to share the process I used to make these contacts and continue to update this page as I gain more experience.

This is for manually tuning / simple portable use.

Equipment

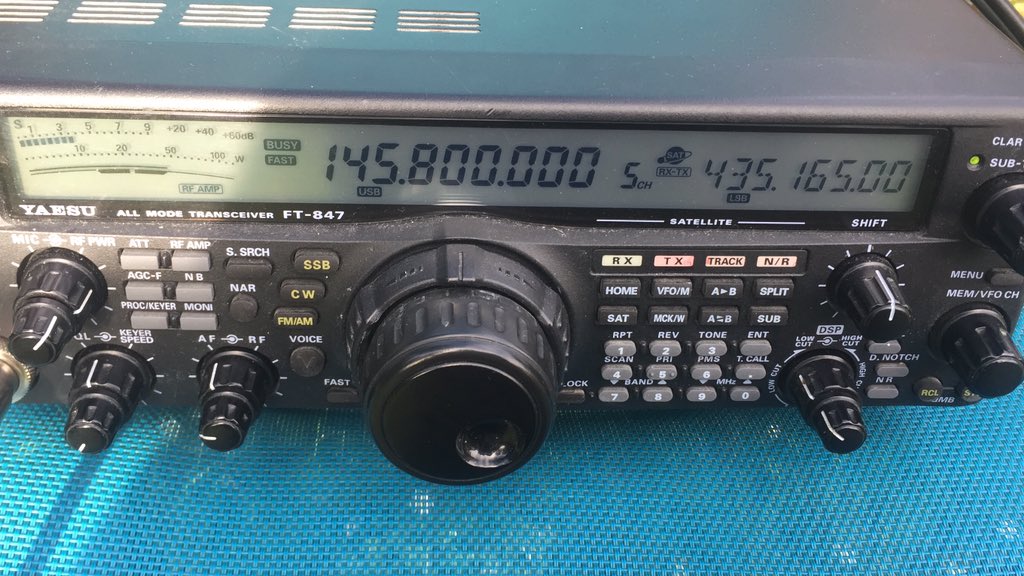
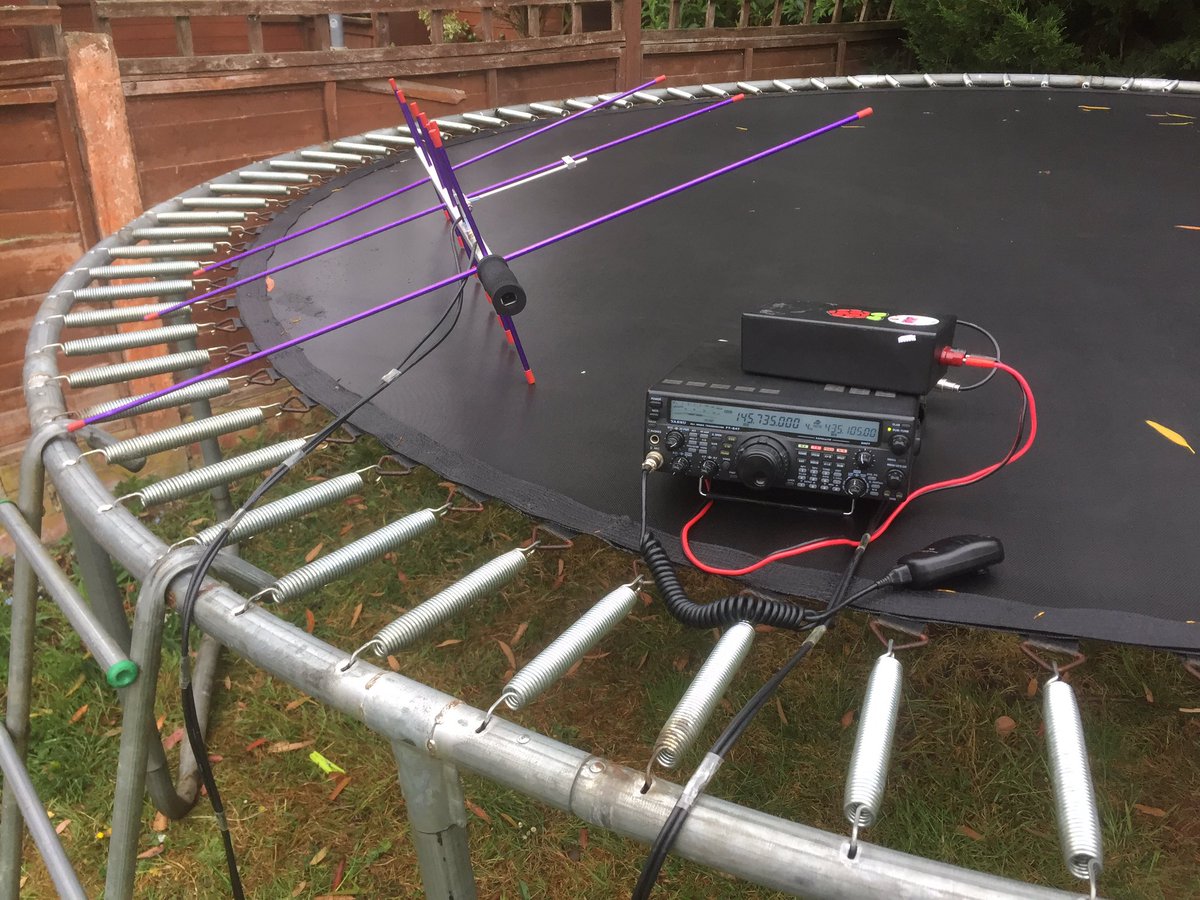
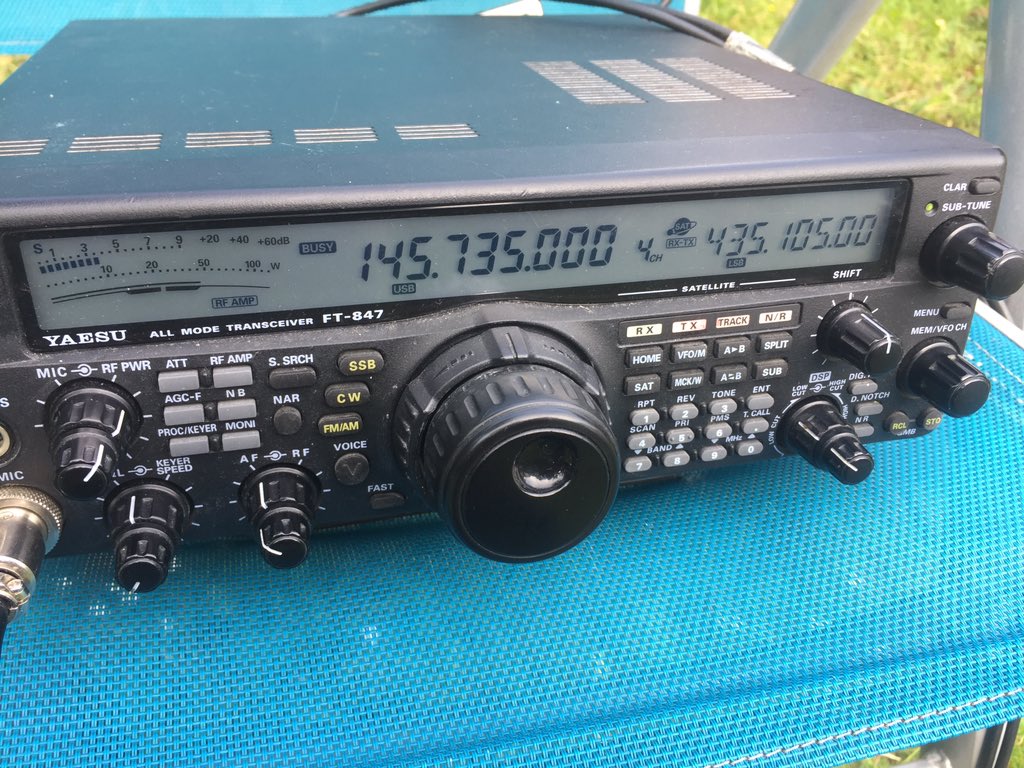
Yaesu FT-847
2 / 70 arrow antenna (short one...not alaskan)
I run 2 lengths of coax one end with BNC (to the arrow antenna) and the other end 1 N-type (70cm port of radio) and the other a PL259 (2 meter port of the radio)
No filters or diplexers used.
I also have a lipo battery in a box (more here)


Set up and preparation

Set power to low, and move up a little if needed!
I spend a little time programming the radio 
In the standard memory of the Ft-847 I set up the beacon frequency of several SSB satellites.
In the satellite memories of the Ft-847 I set up the TX and RX suggested frequencies
Have a look here on how to program the memories 

Beacon frequencies

FO-29     435.795
AO-73    145.935
XW-2A   145.660
XW-2B   145.725
XW-2C   145.790
XW-2D   145.885
XW-2F    145.975
CAS-4A  145.855
CAS-4B  145.910
EO-88      145.940
EO-79      145.840

I would suggest before trying a voice contact, practice tracking and finding the beacons, get used to moving the antenna and tuning the radio for doppler
For an idea of what you are likely to hear take a look at the videos here 

Satellite voice frequencies

Name                     RX                          TX
FO-29                    435.820                  145.980
AO-73                   145.954                   435.146
XW-2A                  145.670                   435.045
XW-2B                  145.735                   435.105
XW-2C                  145.800                   435.165
XW-2D                  145.866                   435.224
XW-2F                   145.986                   435.344
CAS-4A                 145.870                   435.220
CAS-4B                 145.925                   435.280
EO-88                    145.980                   435.025
EO-79                    145.950                   435.050

First contact

I use a satellite tracking program called GoSatWatch (runs on IOS) there are many variations for all phones, find one that works for you, they all do pretty much the same.
Set up your app to track the above 11 satellites. The application will give you an idea of the direction the satellite is travelling and at what angle, your job is to point the antenna at the satellite and follow its movement across the sky, ssb seem to move more slowly than FM to me.

Set up the radio, set the memory to the beacon frequency of the satellite you want to use, tune a little up and down whilst pointing the antenna in the general direction, once you find the beacon get used to which way the satellite is moving and try find a place to rest the antenna (pointing at the satellite, I used a garden chair) this gives you a spare hand to use! now swap to satellite memory of the radio (transmit and receive frequencies) Start your CQ call, you will adjust the RX frequency until you hear yourself on the downlink. you will need to move the RX frequency constantly as you transmit to keep up with the doppler change.

It takes a bit of time to find yourself, what I did was tune the RX frequency down and up to try find myself, if I got lost, I turned the memory knob to go back to default satellite memory (tx / rx) and started again. You may also want to swap back to standard memory and listen again for the beacon to ensure you are still pointing the antenna in the right direction.


My very first full duplex XW-2A contact (which really took me by surprise) 2 contacts
Have a listen here I worked F4DXV and G0ABI
I then tried XW-2C and as you here at the start of the audio, the power was way too high.
I was able to hear myself on the downlink and as you hear it's hard to keep it steady!
eventually after a few calls I got ON7CL Take a listen here 


Next level

I took a risk and ran special event station GB1MIR and managed to work a few more stations on SSB satellites.

XW-2A   https://t.co/XqO9u0aDmO Contact with f5mse in Normandie France


XW2-B     https://t.co/2XOgQCJdmt  with LA7XK in Norway
ssb satellite practice

Check the satellite status first

To check the status / mode of a satellite, please use this link http://www.amsat.org/status/
Some satellites switch between data and transponder (repeater) modes.
This will save disappointment when all you hear is data, when you wanted a qso, or vice versa.


Note these SSB satellites DO NOT use CTCSS tones

You can download a chirp file here

In the charts below you will notice that transmit (UP) is always lower side band (LSB)
So it makes sense that Receive (DOWN) is always upper side band (USB)

It is highly recommended, if not required when operating SSB satellites to use 2 radios so you can hear your downlink, and not tread on anyone's toes or cause interference. It will also greatly help find your in and out frequencies.So please be considerate, operate well, listen lot's.

If you do not have 2 radios for full duplex operation, it is possible to work satellites using semi-duplex. However this is reserved for expeditions, or rare occasions where 2 radios is just not practical. Its frowned upon in the satellite community and causes issues.

These issues as you will hear frequently on the FM satellites include the operator calling CQ repeatedly and not able to hear the reply or calling out over the top of someone as there were not aware they were there. Just like on a normal repeater these habits are bad practice and cause frustration to others users, imagine missing that rare square or locator due to someone shouting cq over the top of you and just as the satellite pass finishes.

DON'T call CQ, listen and respond, if no one is around call sign sat (call /sat...)
a general qso is hello call, this is call your signal report 5/9 my locator IO67AS.
Short and simple, should be able to get a few in one pass, but if you have to ask the operator to repeat this takes up valuable time.

If you really have the need to work semi-duplex (Please don't)


How do I set the radio up to do split frequency / mode?

We only have access to a Yeasu 817 and 859, so We will include the instructions below, happy to add more makes and models as needed if it helps.

Yeasu 857D and Yaesu 817
Press the [FUNC] key momentarily, then rotate the SELECT knob, as needed, until Multi Function Row “a” [A/B, A=B, SPL] appears on the display.

Now press the [A](A/B) key to toggle between the “A” and “B” VFOs.

As an example for FO-29 set VFO "A" as 435.850 LSB Down / receive
Press [A](A/B) will move you to VFO B and set the frequency to 145.950 USB
Press [A](A/B) again to return to the VFO A
Press [C](Split) do a test TX and check that you RX on 435 and TX on 145
You are now ready to try Sats, change the up / down frequency for each Sat

Listen several times before you attempt to transmit

As with all good radio practice, get used to the new mode and operating style before attempting a CQ call or QSO. SSB satellites are a little bit tricky to receive initially, especially if you are going to tune manually (which we are). Using your favorite satellite tracking software work out where about the pass is, and point the antenna in that general direction. Using our example of FO-29, start at 435.850 and tune *slowly* either side of that until you hear a qso, this may be Morse or Voice. See how the signal drifts up or down the band, tune to adjust for this (Doppler effect). Get used to this slow tuning technique, it will be needed in the next stage when you are ready to transmit.
Peter 2e0sql on FO-29 its not easy initially tuning !


Morse code heard on FO-29


Attempting your first SSB QSO on Satellite

Once you have a good grasp of listening and tuning to follow a conversation, its time to try and call CQ. The charts below give you a rough idea of where you transmit and where you should be heard.
On FO-29, you transmit on 145.950 and should be heard around 435.850 +/-
Arranging a schedule with a more experienced sat operator, will be good idea on your initial go, they will be able to find you and respond (thanks Peter 2E0SQL).
So once the satellite is overhead, start calling CQ on the center frequency 145.950, give about 15-20 seconds, this allow the receiver to find and tune in to you. When you stop transmitting listen for a response, tune a small amount either side and see if you can find someone calling back to you.

Following what is referred to as, click the link for an in depth discussion,  the one true rule
The best approach is to tune on the higher frequency band (UHF / 70cm / 435.x)

For FO-29 and AO-7 (Mode A),You will adjust RX frequency, as this is the higher frequency used.
If you get a response, put into practice what you learnt above and tune slowly to get the best reception.

However, on the other satellites where the Frequencies are reversed we need to tune the TX frequency as this is on the higher frequency

Using the charts below, they help give you a rough idea of where you TX and where you should be heard.

Bob M6FLT and Ian 2E0IPP at Windsor Castle having just worked FO-29, 5 watts Yeasu 817 and arrow antenna.


We want to hear how you get on

We are keen to hear how you get on tracking and working satellites and would be happy to share pictures, sound recordings and videos. We are on Twitter @chertseyrc and via e-mail jamesm0jfp@virginmedia.com

Here are several charts to help you with the SSB satellites kindly provided by Paul K5PAV‏ 


Thursday, 23 March 2017

SO-50 and Fo-29 Satellite passes at Windsor castle

Shot of Windsor Castle our /p for the night

Bob M6FLT trying sats.
Iam 2E0IPP working sats.
Ian and Bob working Peter on FO-29
Ian and Bob after the FO-29 pass


Have a listen to the recording here: https://drive.google.com/file/d/0B_1dHk8Yo754Z3ZsV29pZkc1TWc/view

Trilogy / kydera cdm-550h 40 Watts UHF Mobile DMR


So the 550 arrived and this is a quick demonstration of what in the box and how to set it up.


Please throw away the CD, its not needed and is probably not a good idea to place on your PC, please download software from trilogy.org.uk web site.
Box contains the usb / programming cable, power cable, mounting bracket, mic bracket, microphone and of course the radio!

Here is the radio fresh out of the box, The radio is 140X175X46MM average size for a mobile.
The radio has a large display and several easy access buttons. Top Left selects the Talk group, Right top is digital volume, bottom is analogue volume control.

As you can see, when powered up, using a PSU or 12V battery, the screen is large and bright, easy to ready with large clear text. The surrounding buttons are also illuminated which will help when used in the car at night. From the display you can see Digital is selected (black arrow pointing at digital), pressing and holding the right bottom button will select Analogue mode. The last line shows the Repeater you are on, and the second line shows the talk group. The very top line shows the signal, power level, time and current voltage.

When you press the bottom left button, you access the menu, using the top left tuning knob, you can move up and down the menu, pressing the bottom left button to select the sub menu's.
From the menu you can adjust the power, change the repeater, set up the GPS, set time and date and send / receive text messages.


Quick video above showing menu being accessed.

Video above working into my local repeater GB7HR and a short conversation.
You can hear the quality of the incoming call is crystal clear and no issues at all.
The DMR ID is displayed, and in the contacts setting you could add the ID / name and the name would be displayed.

All the usual DMR features work on this mobile radio, Text messages, stun, kill, emergency alarm.
This model also has GPS, a GPS antenna is connected at the rear of the unit using a SMA connector.

The main aerial connector is a standard SO239.

I'll add more pictures and video wit the advanced features as time permits.


So you have a quite powerful fully featured DMR mobile, how much is this going to cost you?
Programmed and delivered £295. This includes the import duty and currency exchange fee's.

Remember Trilogy was created from Chertsey radio club and its principles are to supply cost effective DMR equipment, programmed and ready to use out of the box. We do not charge VAT, we do not make profit.

Please contact sales@trilogy.org.uk for more information

73

james / M0JFP / WO2I

Monday, 20 March 2017

GB4LNX Lynx helicopter special event station

BBC New articles:

http://www.bbc.co.uk/news/uk-england-dorset-39307488
http://www.bbc.co.uk/news/uk-england-39302256

The fly over as seen from Chertsey:


Our radio station:


Received QSL cards for our special event station:


Thursday, 16 March 2017

New release of DV4 mini software and firmware but older dv4 ownersbeware!!

WARNING

The headphone / PC ONLY works if you have the new dv-mini with the built in AMBE chip.
If you have the older version then sorry its not going to work for you!

We are asking if an upgrade will be available and will keep you all posted.
Wireless holdings offered trade in for $99

The firmware and software upgrade for standard dv4-mini is to improve the DMR QRG correction, this is now automatic.

For the AMBE folks you now get PC access to C4FM


Version of 6.3.2017  of the dv4-mii software comes with an additional feature which we had not seen before.

Like the original blue Dstar dongle, the DV4-mini can now allow you to use the PC headset (speakers and microphone) This means you no longer have to have 3 different radio's to use the 3 different modes, dstar, dmr, c4fm / fusion) 


Manual-DV4mini_English-V2_0-2016_07_23.pdf
Once you have downloaded the software and installed it, to set up the headphones you have to run a program separately, in C:\Program Files (x86)\DV4mini you will find a program called PCMtrx, double click on this to bring up the audio controller and set to your pc speaker and microphone (or headset)


Downlaod software and the latest firmware here.

Also noting that by connecting your psk data dongle you could with some hacking create an EchoLink type node!
More on this later (c)CRC imagination